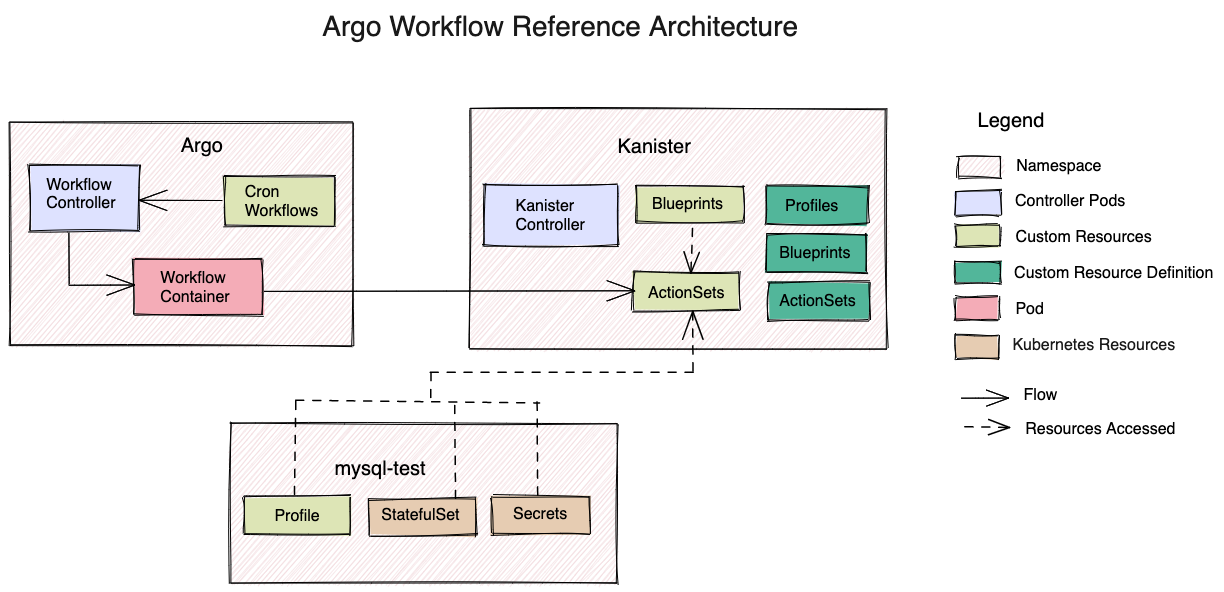
 Kanister
Automating ActionSet Creation using Argo Cron Workflows
Argo Workflows enables us to schedule operations. In the Kanister project, Argo Cron Workflows will be used to automate the creation of ActionSets to execute Blueprint actions at regular intervals.
To summarize, ActionSets are CRs that are used to execute actions from Blueprint CRs. The Kanister controller watches for the creation of ActionSets and executes the specified action.
In this tutorial, you will schedule the creation of a backup ActionSet using Argo Cron Workflows.
Prerequisites
- Kubernetes
1.20or higher. - A running Kanister controller in the
Kanisternamespace. See Installation kanctlCLI installed. See Tools.
Architecture
Steps
Step 1 - Setting up Argo
Download the Argo CLI from their Releases page.
Create a separate namespace for the Workflows.
kubectl create ns argoIn this tutorial, the Argo Workflows CRDs and other resources will be deployed on the Kubernetes cluster using the minimal manifest file.
kubectl apply -f https://raw.githubusercontent.com/argoproj/argo-workflows/master/manifests/quick-start-minimal.yaml -n argoYou can install Argo in either cluster scoped or namespace scope configurations. To deploy Argo with custom configuration, download the minimal manifest file and apply the necessary changes. For more information, see ManagedNamespaces.
Use port-forward to forward a local port to the argo-server pod's port to view the Argo UI:
kubectl -n argo port-forward deployment/argo-server 2746:2746Open a web browser and navigate to localhost:2746
Step 2 - Setting up a sample application to backup
Here, you will reference the MySQL example from Kanister.
- Install the chart and set up MySQL in the
mysql-testnamespace. - Integrate it with Kanister by creating a Profile CR in the
mysql-testnamespace and a Blueprint in thekanisternamespace. - Copy and save the names of the MySQL StatefulSet, secrets, Kanister Blueprint, and the Profile CR for the next step.
Step 3 - Creating a Cron Workflow
Now, create a Cron Workflow to automate the creation of an ActionSet to backup the MySQL application. The workflow will use kanctl to achieve this. Modify the kanctl command in the YAML below to specify the names of the Blueprint, Profile, MySQL StatefulSet, and secrets created in the previous step.
kanctl create actionset --action backup --namespace kanister --blueprint <BLUEPRINT_NAME> --statefulset <NAMESPACE/STATEFULSET> --profile <NAMESPACE/PROFILE_NAME> --secrets <NAMESPACE/SECRETS_NAME>Then execute:
cat <<EOF >> mysql-cron-wf.yaml
apiVersion: argoproj.io/v1alpha1
kind: CronWorkflow
metadata:
  name: mysql-cron-wf
spec:
  schedule: "*/5 * * * *"
  concurrencyPolicy: "Replace"
  workflowSpec:
    entrypoint: automate-actionset
    templates:
      - name: automate-actionset
        container:
          image: ghcr.io/kanisterio/kanister-tools:0.81.0
          command:
            - /bin/bash
            - -c
            - |
              microdnf install tar
              curl -LO https://github.com/kanisterio/kanister/releases/download/0.81.0/kanister_0.81.0_linux_amd64.tar.gz
              tar -C /usr/local/bin -xvf kanister_0.81.0_linux_amd64.tar.gz
              kanctl create actionset --action backup --namespace kanister --blueprint mysql-blueprint --statefulset mysql-test/mysql-release --profile mysql-test/s3-profile-gd4kx --secrets mysql=mysql-test/mysql-release
EOF
NOTE
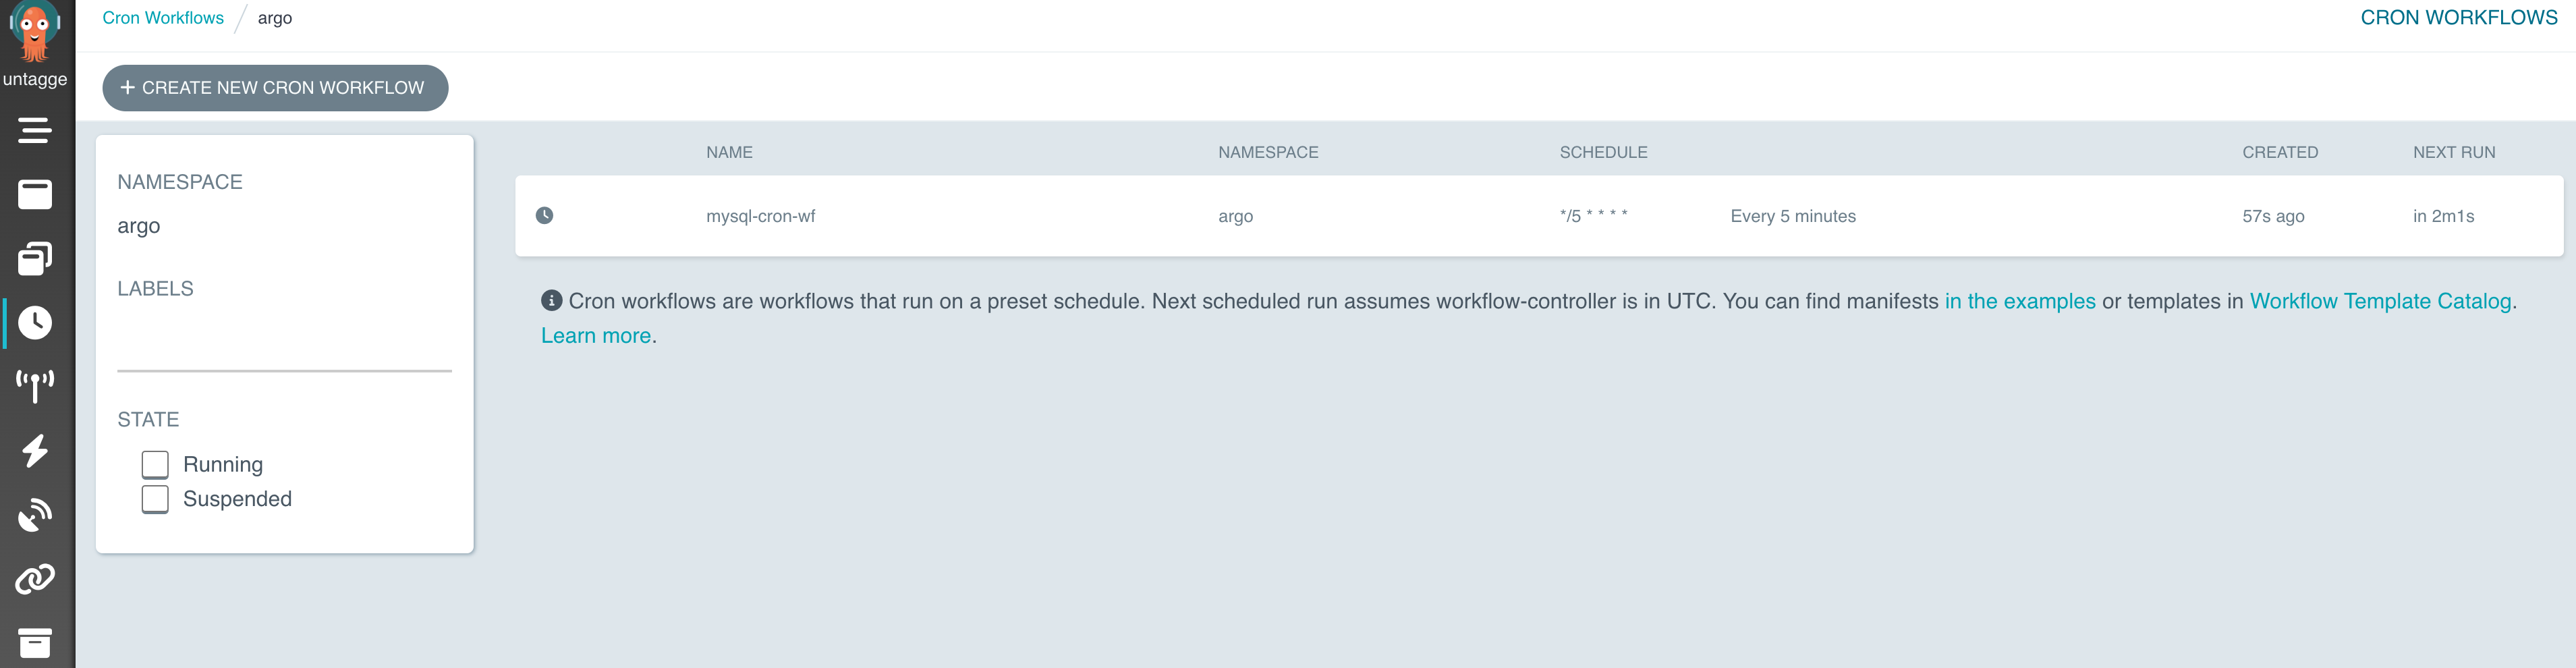
Here, the cron job is scheduled to run every 5 minutes. This means that an ActionSet is created every 5 minutes to perform a backup operation. You may schedule it to run as per your requirements.
Step 4 - Granting RBAC permissions
Next, you will grant the required permissions to the Service Account in the argo namespace to access resources in the kanister and mysql-test namespaces. This is required to create CRs based on the Secrets and StatefulSet that you provided in the previous step. You may read more about RBAC authorization here - RBAC.
- Create a RoleBinding named
cron-wf-managerin thekanisterandmysql-testnamespaces. - Grant the permissions in ClusterRole
cluster-adminto the default ServiceAccount nameddefaultin theargonamespace.
Execute the following command:
kubectl create rolebinding cron-wf-manager --clusterrole=cluster-admin --serviceaccount=argo:default -n kanisterkubectl create rolebinding cron-wf-manager --clusterrole=cluster-admin --serviceaccount=argo:default -n mysql-testNOTE
It is not recommended to grant the cluster-admin privileges to the default ServiceAccount in production. You must create a separate Role or a ClusterRole to grant specific access for allowing the creation of Custom Resources (ActionSets) in the kanister namespace.
Step 5 - Launching the Cron Workflow
Launch the workflow in the argo namespace by running the following command:
argo cron create mysql-cron-wf.yaml -n argoCheck if the workflow was created by running:
argo cron list -n argoWhen the workflow runs, check if the ActionSet was created in the kanister namespace:
kubectl get actionsets.cr.kanister.io -n kanisterThe output should be similar to the sample output below.
$ argo cron create mysql-cron-wf.yaml -n argo
> Name:                   mysql-cron-wf
  Namespace:              argo
  Created:                Fri Jul 22 10:23:09 -0400 (now)
  Schedule:               */5 * * * *
  Suspended:              false
  ConcurrencyPolicy:      Replace
  NextScheduledTime:      Fri Jul 22 10:25:00 -0400 (1 minute from now) (assumes workflow-controller is in UTC)

$ argo cron list -n argo
> NAME            AGE    LAST RUN    NEXT RUN      SCHEDULE      TIMEZONE        SUSPENDED
  mysql-cron-wf   12s    N/A         1m            */5 * * * *                   false

$ argo cron list -n argo
> NAME            AGE    LAST RUN    NEXT RUN      SCHEDULE      TIMEZONE        SUSPENDED
  mysql-cron-wf   4m     2m          2m            */5 * * * *                   false

$ kubectl get actionsets.cr.kanister.io -n kanister
> NAME            AGE
  backup-478lk    2m28s
In the above example, the workflow was created and scheduled to run in 1 minute. This scheduled time can be anywhere between 1 to 5 minutes for you. Once the workflow runs successfully, the LAST RUN field is updated with the timestamp of the last run. Along with this, a backup ActionSet must be created. The creation time of the ActionSet is indicated by the AGE field as seen above.
You should see the workflow on the Argo UI under the Cron Workflows tab.
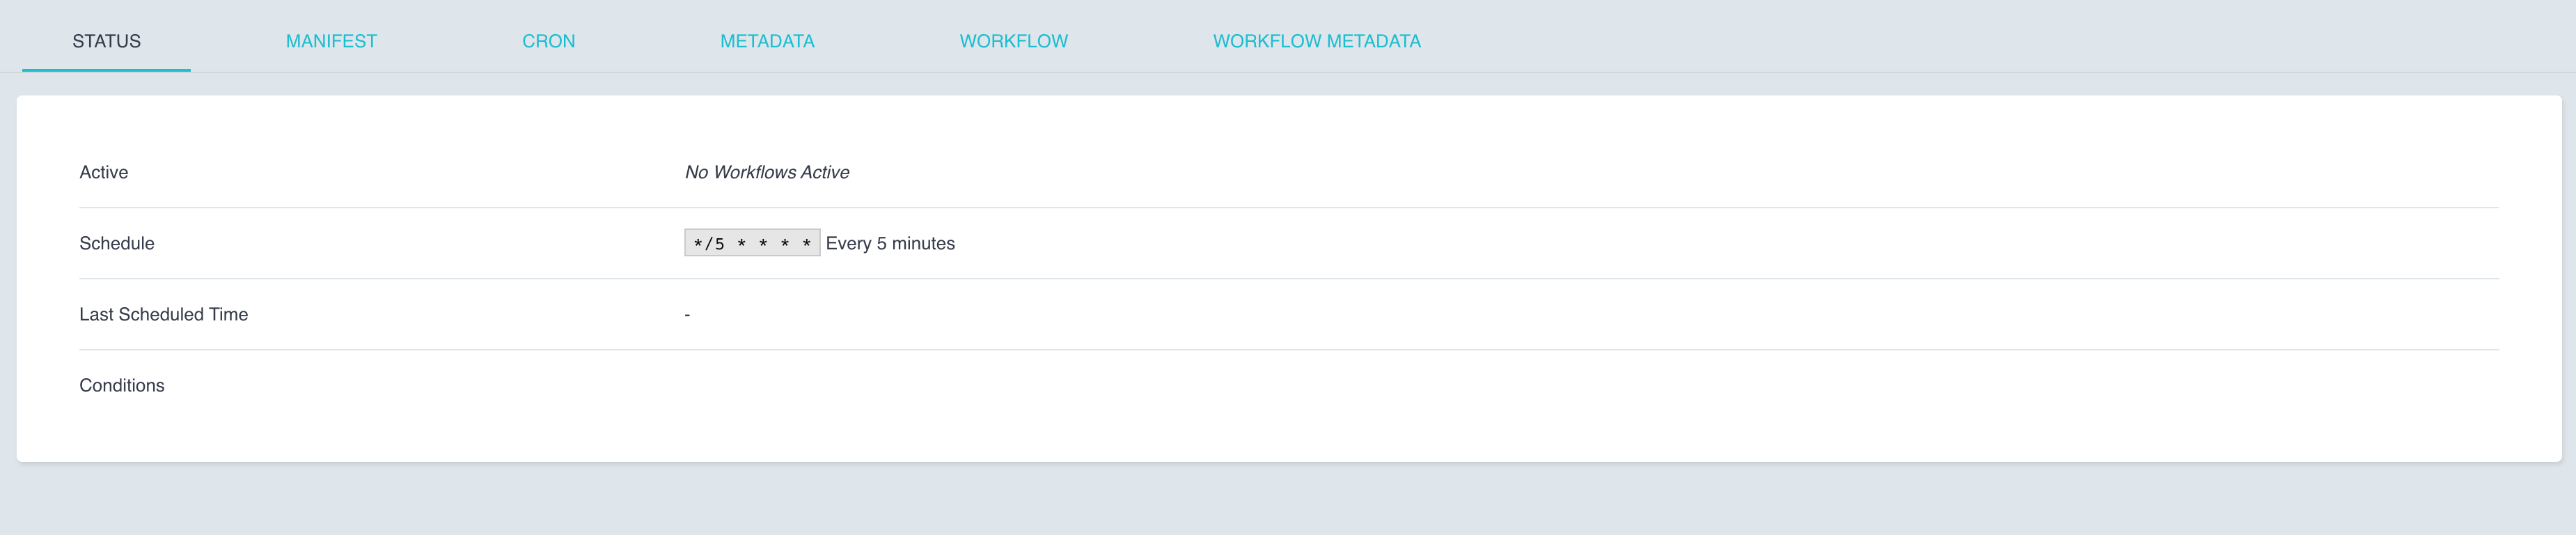
On clicking on the workflow name, you will see its status.
Troubleshooting
If the Cron Workflow does not run, check if the pod to run the workflow was created in the argo namespace. Examine the logs of this pod.
kubectl logs <NAME_OF_MYSQL_CRON_WORKFLOW_POD> -n argoIf this pod was not created, examine the logs of the Argo Workflow Controller in the argo namespace.
kubectl logs <NAME_OF_WORKFLOW_CONTROLLER> -n argoIf the logs mention that you have not granted the right permissions to the ServiceAccounts, circle back to Step 4 and verify your RBAC configuration. Your ServiceAccount should have access to the requested resources.
kubectl get serviceaccounts -n argoCleanup
Delete the cron workflow by running the following. Verify the name of your workflow before deleting it.
Verify workflow name:
argo cron list -n argoDelete workflow:
argo cron delete mysql-cron-wf -n argoDeleting the Argo CRDs and other resources:
kubectl delete -f quick-start-minimal.yamlDeleting the Argo namespace:
kubectl delete namespace argo